Sew: Lined Tote Bag
Today I'm going to be showing you how to sew your own lined tote bag. My sister (Hannah) and I decided to have a sewing day. We carried our sewing machines down to the dining room and set up camp there. We each sewed a lined tote bag. It is a really simple project and would definitely make a great gift. I would say that this project is perfect for this time of year for days down the beach. However we haven't really had the best weather so far this summer. Hopefully it will perk up soon! Anyway, that's enough about the weather... on with the tutorial.
What you'll need
Bag Fabric (1m should be enough)
- I used an upholstery type fabric as it gives the bag more stability and structure. It seems like a canvas type fabric to me. I bought the fabric from the first Abakhan Secret Sale.
Lining Fabric (1m should be enough)
- I used an old pillow case, however my sister used a piece of 100% cotton fabric
Straps
Good fabrics to use would be:
- Vinyl
- 1" wide Webbing/ Twill Tape
- The same as your bag fabric.
Cutting your fabric
Cutting your bag pieces
Cut two rectangles of fabric 18"x16". Make sure to take note of the direction of the print of fabric as you don't want the print to be going the wrong way.
Cutting your lining pieces
Cut two rectangles of fabric 18"x16". I used plain fabric but you could use patterned if you wish.
Cutting your straps
Cut two rectangles of fabric/vinyl 27"x4". If you are using 1" wide webbing, cut two pieces 27" long.
Sewing the outer bag
Place the two piece of bag fabric right sides together (making sure the fabric print is running in the correct direction). Pin along the two sides and bottom of the bag.
Sew these three sides using a regular straight stitch.
Snip the bottom two corners so that when you turn it right side out the corners will be sharp. Be careful not to cut through your stitches. When you are poking the corners out I use the end of a pencil or a chopstick. I wouldn't recommend using scissors as you might accidentally break/cut through.
Sewing the lining
Place the two pieces of lining fabric right sides together. Pin along the two sides and bottom of the bag.
Sew the two sides using a regular straight stitch and sew the bottom of the lining but leave a 2" gap in the centre. Remember to backstitch at the top of both sides and next to the gap.
This is important because you will need the hole to be able to turn the bag right side out. Snip the bottom two corners so that when you turn it right side out the corners will be sharp.
Sewing the lining and outer bag together
So you should have two "bags", one made from lining and one made from outer fabric.
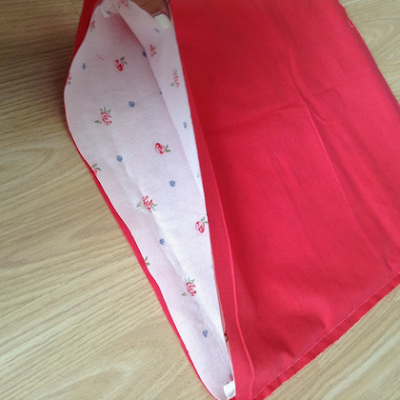
Turn your lining bag inside out. Now place your outer bag inside the lining bag with right sides together.
Pin the top edges together. Now sew along the top edges.
Now turn it the right way around by pulling the bag through the hole in the lining. Sew the hole in the lining closed.
If you want this stitching to be invisible then its best if you ladder stitch this hole closed by hand. Or if you don't mind stitching to be visible in the lining then tuck the raw edges of the hole inside then top stitch across the hole. Push the lining back into the bag and make sure they lie flat. I decided to top stitch along the top edge of the bag to make sure that the lining stays inside the bag and gives the bag a nice clean finish.
Sewing the straps
Fold the two sides of the strap into the centre.
Now fold the strap in half so that the raw edges are enclosed.
Now stitch along the open edge of your strap using a regular straight stitch.
Turn under half an inch on both ends so that it doesn't fray.
Sewing the straps onto the bag
I like the look of straps sewn onto the front of the bag so I placed my straps onto the bag 2" inches from the sides of the bag with a 1 inch overlap from the top edge.
When stitching the strap into place, sew a rectangle and sew a cross through it. This reinforces the strap making it longer lasting.
Now for my favourite part of any tutorial, the finished item pictures!
This bag can be made in an hour or so. Do you rather a project that you can start and finish same day?


Alot of sites I see nowadays don't generally give anything that I'm occupied with, yet I'm most definately inspired by this one.
ReplyDelete24hourwristbandbags
Scottie pippen needs to slap himself for saying Lebron is better than Jordan smh no comparison james need more experience PERIOD !,RatherUniqueJ, tote bags
ReplyDelete